Thursday, January 10, 2013

Dashing Through the Dough


That statement pretty much sums up my holiday season. Literally (and probably just like some people, figuratively too). From Thanksgiving until Christmas, it seemed like my oven was never turned off. If it could talk, it would have probably  begged me to give it a little break. It was a busy holiday. Busy but fun :)

This display below was from the Holiday Open House my sister and our friend hosted.  It was a fun start of my "baking season".  I made cupcakes, mini berry tarts, macarons, cake balls, and gingerbread cookie pops.  I also made those gingerbread houses, it's just so fun decorating them!

       Vanilla macarons

                This was the only time my kids were off limits from decorating these gingerbread houses!

                                                        Red Velvet cake balls

                                                    Gingerbread cookie pops

Christmas tree cupcakes.  When I get a chance sometime, I'll put a tutorial here on how to do that :)


Right before my son's winter school break, his friend Mason came over for a playdate.  To keep them busy I thought I'd let them decorate a giant gingerbread man.  I didn't have a giant cookie cutter so what I did was trace a gingerbread man/girl cookie cutters on paper then enlarge it in my printer.  I enlarged until it occupied pretty much  the entire 8 1/2" x 11" sheet of printer paper.  I cut it out the used that as a template to cut the gingerbread cookies. 


And here they are decorating. They look so serious!


Logan's gingerbread man

Izzie's gingerbread girl

Mason's gingerbread man

Here they are altogether.  Can you tell who loves sugar?

I mentioned this was a busy season for me.  My sister asked me to make her gingerbread house kits and cake balls to give as presents for her friends and co-workers.  So, her wish is my command (hahaha, well especially if she's paying me for it!).


So these were the gingerbread house kits.  It included the gingerbread house fully assembled, candies, and the "glue", which is the royal icing for decorating. I actually didn't get to make a lot of gingerbread houses this time.  Previous Christmas,  I made about 30! Yes, fully assembled!  20 of them went to my daughter's preschool (almost a tradition now, although this year we opted for a cardboard box gingerbread houses because of food allergy issues in class), and the rest were given to friends, and I also threw a gingerbread decorating party for my kids' friends.  We didn't get to do that this time because I just got a little too preoccupied, LOL.  I kinda feel bad because a couple of kids who were at the party asked me if we were going to do it again. I'm glad they really had fun and I'll have to make it up for them sometime this year somehow :)  Thinking of a Valentine's party.
And here are the cake balls.  I don't remember how many there were, but it was a lot! Aside from what my sister ordered, I also made some to give to my friends.  I don't know if I'm gonna make cake balls for a while!


Chocolate, Red Velvet, White Chocolate Peppermint, and Gingerbread cake balls. 


I put four of them in a box. I love those candy boxes!


Speaking of friends, I made crinkle cookies for them.  Acually prior to these batch, I've made a few batches too to donate to my son's school's PTA for their annual "cookie exchange" for the entire school staff.  I guess it wasn't really an "exchange" since the staff didn't make them.  They just got to pick out cookies and baked goods they want that were donated!  Lucky! But they do deserve it--for all their hard work and caring for our children :)


You'll notice though that this batch didn't have the white powdery stuff on it.  Instead of rolling it in just plain powdered sugar before baking, I rolled it in powdered sugar with cocoa powder to give it more chocolatey flavor.  For those asking me for the recipe, click here.  I give credit to Williams-Sonoma on this one.  I tried crinkle cookies for the first time when my in-laws came for a visit a week before Christmas. My MIL made crinkle cookies and I fell in love with it! But I forgot to ask for the recipe and I just had to have the recipe right away (LOL) so I Googled one and found the Williams-Sonoma version really yummy!


This is how I packaged them.  Thank you Martha Stewart for your beautiful packaging!! If you haven't noticed by now, I'm a big Martha fan!  And those packaging I found at Michaels were already on clearance! Score! 


On Christmas Eve, I decided to do a little craft with my kids. I love Pinterest and I do browse in there a lot for craft ideas, but I'd like to take full credit on this idea hahaha! I present to you the "Gingerbread House Snowglobe"! Ta-da!

                         
I had some left over gingerbread cookie dough but didn't  have enough to make 2 regular sized houses. And I just refused to make another batch, so worn out from all the baking at that point!  But when it comes to crafts, my kids had have their own.  So, I had to make the houses smaller to make 2.  The houses end up being about 3 inches wide and about 4 inches tall.  I assembled the houses on a 6" cake board and had the kids decorate them.


Went to Michaels and got  6" glass "fish bowls".  I'm not really sure what was the right term for it, but that's what I call it.

Here are the materials: the houses, the bowls, candies, and royal icing.

And here they are decorating.  Again, looking so serious! What's up with that?


Finally, a smile!

Showing his little gingerbread guy

The little guy


These were the only ones that Izzie let me do.  These little things were only about an inch! So cute!


See how she lined up her gum drops?  My daughter has always been like that!  She wants things a little more organized! 


Izzie's on the left, Logan's on the right.

These were both Izzie's, front and back. I didn't get to snap Logan's. 


Voila! After decorating the houses, just put the bowls over it. If you want, you can seal the bowl with royal icing.  I didn't do that here since we just left them for display on a table.  I think next Christmas when we do this again, I'm going to find a plastic bowl instead of glass, I'd feel much safer working with plastic with the kids. One good thing about putting a globe over it is that the kids were not tempted to grab and pick on the candies while displayed! Especially when I'm not looking :)
Well, I hope you enjoyed reading through my busy season. And I hope that I gave you some ideas to make for next Christmas!


Saturday, November 10, 2012

More cakes

Just a quick post.  These were the cakes I made the past few weeks that I didn't get a chance to post until now.  It was a busy October!

These were cupcakes I donated for my son's school's cake walk during their Halloween dance.  The decorations were made of modeling chocolate. I hope the kids enjoyed it!


This one I made for a 1st Birthday. All decorations made from fondant except for the sea shells which were actually chocolates I found at Wegman's!


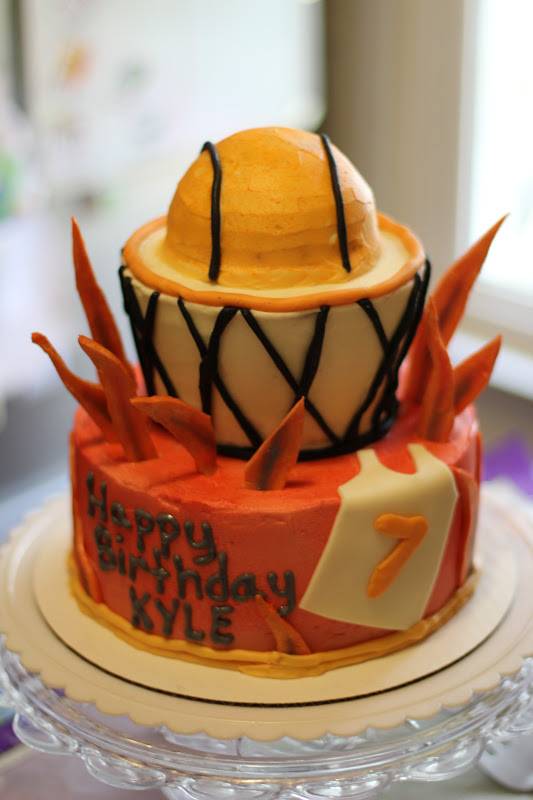
This one was for a Miami Heat fan! My husband's comment on the flames? Reminds him of bacon! Great!! Such a confidence booster! This cake was just covered buttercream but the decorations were made of modeling chocolate.
 
 
Last but not least, also for a 1st Birthday.  I'm gonna sneak this in. This was actually a cake order today :) Covered in fondant, then I piped in the decorations with buttercream. This made me realize that my piping skills are starting to become rusty! I've been doing more and more "molded/modeled/carved" designs that I rarely get to pipe anymore.  Need to practice more!


Friday, November 9, 2012

Our American Girl turned 5

This past Tuesday (November 6), Izzie turned 5! But we actually celebrated her birthday the Sunday before her birthday. I rushed planning her party. Normally, I have a plan even months before her birthday. But with all the school activities and cake orders,  I had only about 2 weeks to get everything ready. I actually surprised myself that I was able to do it!

One good thing though is that she already told me months before that she'd like to have an American Girl doll themed party.  So that made it a little easy, but of course we ended up having a doll/ballet/tea party! And it turned out great! I think all the girls had fun :)

We had her party at the ballet studio where she takes her ballet lessons.  The good thing about this is I only had to worry about the tea party!  The studio provided the "activity" to keep the girls entertained.  They learned ballet, they had games, and did crafts (although I did add a little craft  which you'll see below).  It was so mellow having just girls at the party! Izzie wanted to have "just girls" this time  but I had to tell her that her brother and her cousin will be there too because they're family.  She refused to have them there at first so I had to give her the lecture of "sorry you have no choice, they're family and they're coming" :).

So here are the details of the party:

The Invitation

I just like things handmade :)  Normally, I will make this fancier with embelishments, but I didn't have much time.  So I used Microsoft Paint to do all this and had it printed out at Office Depot since I didn't have a good printer.  Sorry, I had to cover up some personal info :)


The Activity

This is the beginning of the party.  They gathered in circle, introduced themselves and I believe there might have been a discussion about their dolls a little (I was busy taking pictures so I wasn't really paying much attention!)
 
 The dolls got piled up in a corner while the girls danced!
 
 Teaching some ballet moves.  That's Ms. Tuya right there holding Izzie.  She is actually Izzie's ballet teacher.
 
Watching Ms. Tuya.
 
Girls doing the Arabesque.
 
Playing games.  Izzie informed me later on that she really liked this game, where she turns around with eyes closed and finger pointing, then when the music stops, she gets to dance with the girl she ends up pointing to.

The Craft Activity

Izzie and her tiara (that Ms. Tuya lent her during the craft activity).

This was one of the craft activities they had.  They decorated magnet frames with stickers.  Each kid was pulled aside to have her picture taken.  At the end of the party, each of them got a printed picture to use with the magnet frame. Part of the party package from the studio (haha).

The moms helped out at the craft activity too :)

This is the craft activity I brought in.  Proud to say it's all handmade :) Each girl got to make a tutu for their doll.  And it had a matching wand too! If you want to learn to make this, keep reading.  Tutorial is way down below :)


Helping the girls make the tutus for their dolls.


Opening the tutu kit.


Showing off her bear's tutu.

Izzie showing her doll with the tutu and the matching wand.
 
 Right before we headed to the "tea room".  So fun to see the girls expressions!  So hard to get all the kids to smile and look at the camera at the same time!
 

The Tea Party

The treats! They had tea sandwiches, cupcakes, cake pops, fresh fruits, fruit tart, sugar cookies, and of course, the cake.  Yes, all made from scratch!   My pet peeve on this picture?  The back drop!! I wished I put a curtain or something.  I guess photoshop can fix that, right?


Table setting.  I'm glad I was able to snap a few pictures before the girls came in.
 
So glad that I got to use all the tea cups and tea pots again from her 2nd birthday party! On that party, we had an Alice in Wonderland tea party. Just so happy I got to use them again--they've been sitting on the hutch for quite some time :)
 

The cake pops. The flowers were made using modeling chocolate.

The "tutu" cupcakes.  Also, the decorations were modeling chocolate. I can't take full credit on this one.  Thanks Pinterest for the idea!


My first time making fruit tarts from scratch! I think it turned out good :)


Fruit cups.  Love those stand alone cups!! Can even be used for cupcakes!! A bit pricey but...darn cute!


 Saw this cookie cutter on Pinterest, sold by William Sonoma.  I was so happy when I saw this a few months ago at the Williams Sonoma outlet store! I grabbed it without thinking twice!! It's been on my wishlist!
 
 
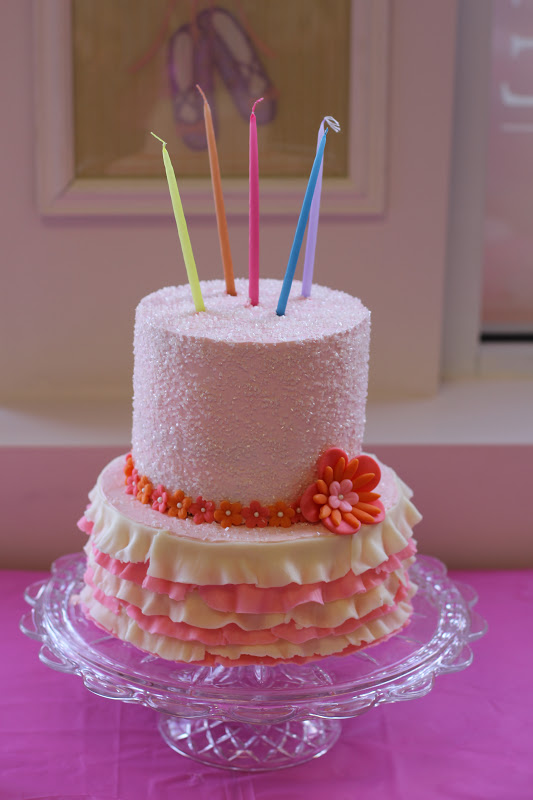
Of course, the "Tutu" cake, designed by the birthday girl herself (most of it! I did some minor changes on the top tier, as you will see in her sketch at the bottom). Top tier is vanilla, bottom is chocolate. This is my first time that I used modeling chocolate to cover an entire cake. Normally, it would be hard doing so since the chocolate dries up pretty fast and can get brittle.  But since the "tutu" is in layers, it was workable.


So this is Izzie's cake sketch.  She said the bottom tier would look like a tutu then the top one will have stripes.  And it will also have flowers all over. Love how she drew her candles and luckily I actually have those long birthday candles sitting around! When I showed her the finished cake, she asked how come the top tier didn't have stripes like the ones she drew!! I had to tell her it was hard to make so I had to improvise.  In all honesty, I was getting tired (I was up until 3 in the morning making the cake and the other treats!) and didn't want to put all those details!! She was fine at the end specially that there were "sparkly stuff" on her cake--the sanding sugar made it sparkle.
 
 
Having tea...well, actually, I didn't serve any tea.  The kids had lemonade.  I wasn't quite sure if the kids were allowed to drink tea so lemonade was a safer choice. 

Digging in!

I don't know but I just love watching the girls hold up their tea cups! So dainty!


Drinking from her very own tea cup.  Her cup has "Izzie" on it.  The same cup we used from her 2nd birthday.  For that party, I used a ceramic pen to personalized the tea cups for each guest. And they got to take home their personalized teacup and saucer as their party favor. 


The dolls had a tea party too! Well, two of them are still sitting up, the rest looks like they've partied too much! Hahaha!


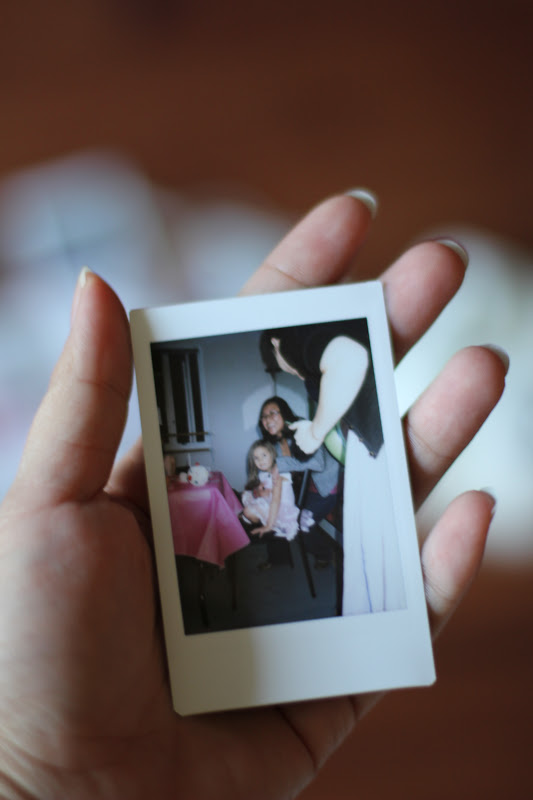
Here's another detail I almost forgot to add here.  During the tea party, the kids got a chance to snap a few pictures that they got to take home.  It's a "Polaroid" camera! I know, I know, it's not the right term but people figure it out right away when you say "Polaroid".  So this camera which I discovered by accident and didn't know it existed, is made by Fujifilm.  It's an instant camera and prints out wallet size pictures--which makes it even more fun!! I thought it was so kid friendly...and kid-sized!! My kids love using this camera now.  The camera itself is fairly cheap (about $70, might be cheaper at Amazon but I found this at Walmart) but the catch is the film! The film costs about $20 for 20 shots! A buck a shot, not exactly a cheap toy for a kid!! But then again, you might find it cheaper at Amazon.

See how tiny this is? It's about the size of a credit card.  Really cute!

 Thanks Amy for snapping this photo!! I rarely get a picture of me and the kids since I'm usually the one behind the camera.

The Party Favor
Izzie's doll guarding the favors...hahaha.
 

I wish I got to snap a picture too of what's inside.  Inside are mini purse, necklace, ring, a small photo book to put the instant pictures they snapped, and stickers and markers to use to decorate their photo book.  I didn't put any candy in it, I figured they'd all be sugared up already at the tea party!  I love the flower decoration, which is an American Girl doll craft kit I got from Michaels.  The thing that I love the most about it are the messages in the flowers like "dream", "sparkle", "share a smile", etc..so American Girl :)

Tutu Tutorial
So here's the tutorial if you'd like to know how to make the tutus!  No Pinterest help on this one :)
Doesn't it look cute on the doll?

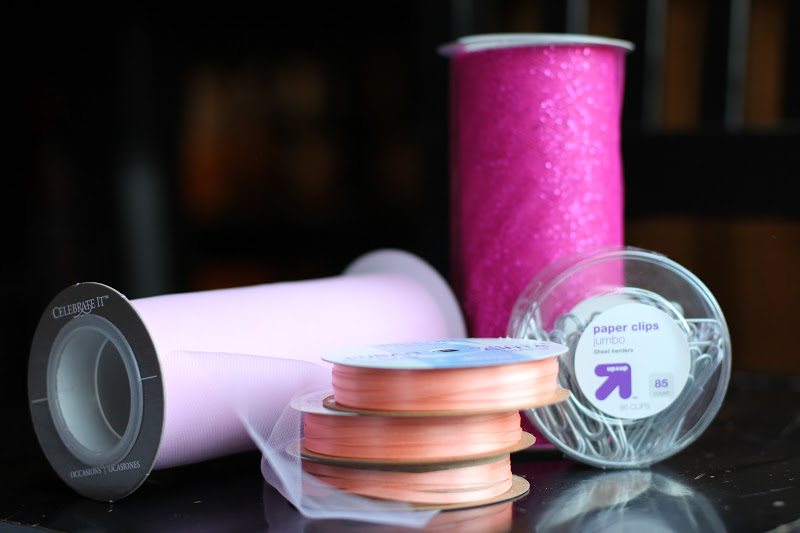
Here's your materials:  6" wide tulle (I used 2 colors), ribbons, and paper clip.  You'll also need to use a sewing machine (or you can do by hand if you don't have one but it will take a little longer especially if you're making more than one), scissors.
 
First, measure the waist of the doll. This will help you determine the length of tulle you'll use.  After you measure, cut the tulle 2 1/2 times of the waist measurement.  So for e.g., if the waist is 10", cut 25" of tulle. Actually if you want to make a fuller tutu, you can even triple or quadruple the length. After cutting, lay it out and overlap the tulle (again, I used 2 different colored tulles) but make the top slightly off from the bottom to create layers.  Then fold it almost in half, about 1/2" from the edge.  Don't let the edges line up so it will create layers.

Sew where it was folded, about 3/4" away from the folded edge (I used 1/2" wide ribbon), or depending on how wide the ribbon you're going to use.  Give a little wiggle room in that case.  This creates the "pocket" where you'll pass through the ribbon to tie up the tutu.

Cut the ribbon in an angle.  As for the length, I cut about 2x the waist of the doll. If you're using a satin ribbon, seal the cut side by quickly running it through a flame.  When I say quickly, I mean quickly! You don't want to light up the ribbon, you just want to slightly singe it to seal the edges so it won't fray.  Apparently, there's actually a tool for cutting and sealing satin ribbon at the same time. But I didn't really want to spend $40 for something I probably won't use a lot. 

Tie the ribbon on a paper clip.  This is how you'll get the ribbon in the "pocket".

 When tying the ribbon make sure the "ends" of the paper clip is pointing down.  That way, when you pass it through the tulle, it won't snag.
 
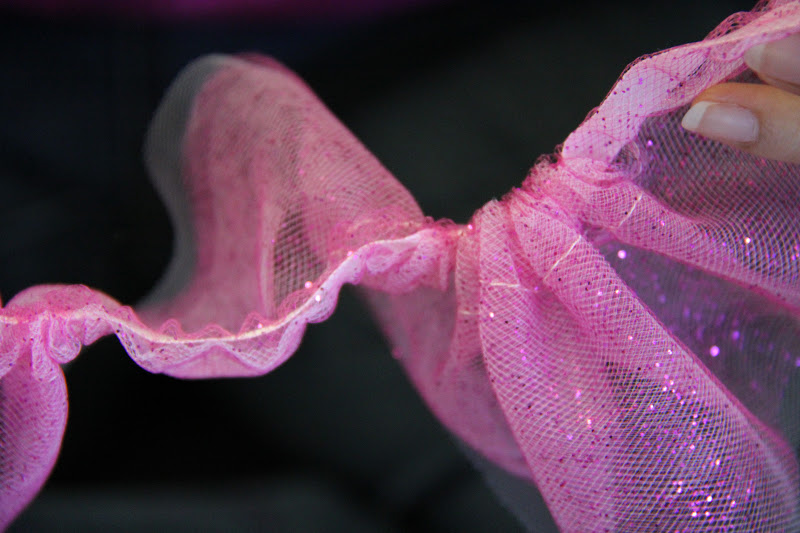
Thread your ribbon into the "pocket" to create the ruffles.  Once you reach the end, take out the paper clip, then wrap it around the doll. By the way, make sure you hold on to the other end of the ribbon (the one without the paper clip) so the ribbon won't pass all the way through.  Grab both ends of the ribbon then tie into a bow.  Then fix the tulle so the ruffles are even all around.
 
Just like this.
 
I hope you enjoyed reading through Izzie's party and the tutorial! If you have questions, ask me! :)